How to Setup a Godex Printer
- You need to plug the printer into the USB and install the driver from the ftp site.
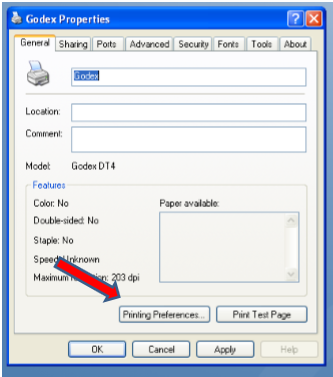
- Once printer is installed, right click on the printer and go to Properties.

- From the Printer Properties, click on Printing Preferences.
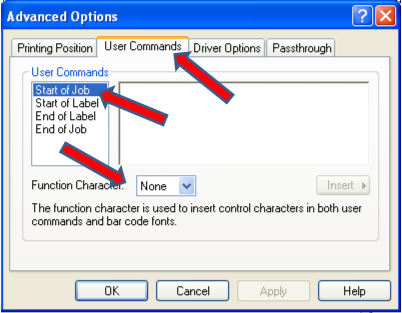
- From Printing Preferences, click on Advanced Options.

- From Advanced Options, click on User Commands and remove the ^ Function Character from the Start of Job.
Exit back out to the Properties window.
On Printer Properties, click on the Tools tab.

On the Tools Tab, you will see the Action button. Click on that button and pick Send Printer Command.

- When you put in a command, make sure you hit enter after the command. You can only do one command at a time.
- Everything needs to be ALL CAPS that is entered in to the command window.
- To set a IP address here is the command you need to use. ^NSP,192.168.3.160,255.255.255.0,192.168.3.1,,,,,9100 Just change the IP address to the one you need it to be.

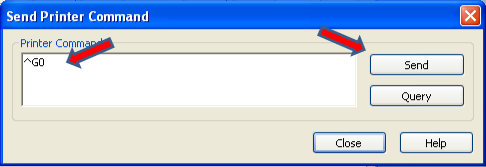
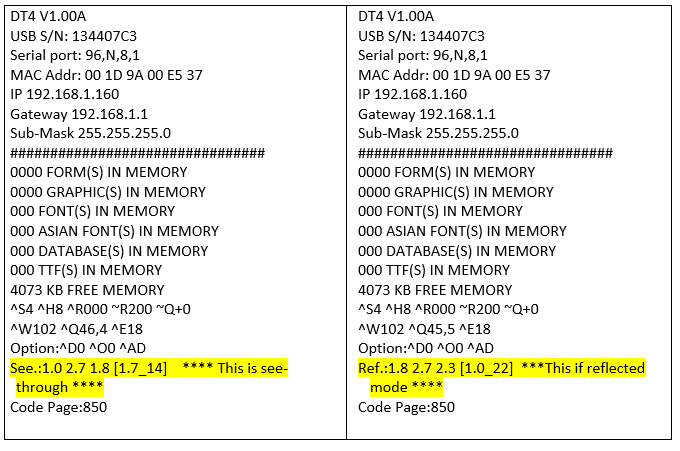
- This setting will set it to Reflected mode. ^G0
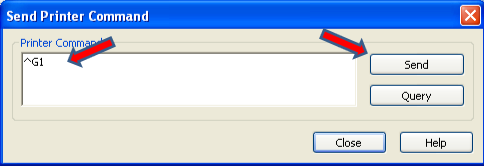
- The Setting will Change it back to auto ^G
- This Setting will Recalibrate the printer to the label size. ~S,SENSOR
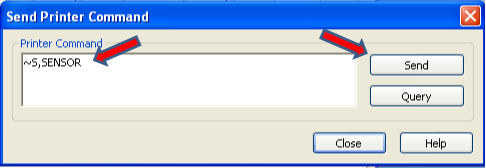
- This setting will get you what the settings are for the printer. Instead of hitting Send, hit Query. ^XGET,CONFIG.

- If you need to reset the password use this command. ^XSET,NETPASSWORD,1111.
- This will reset the printer ~S,ESA ^Z+
- To setup a label printer in ArrowPos you would set it up as a Expediter printer.
o Go to back office > Configuration >Misc. Settings.
o Click on the printers tab
o Add a new printer and put the name that matches the printer name in windows.
o Set the type to zebra printer.
o Click on printer setup on the bottom right hand side.
o Click on the Expediter printer setup button.
o Pick your Godex printer and add what groups you want to print to it and what service types you want it to print for. o You also have an option on the top that is called Print Summary. This will print a label with the address and the customer information on it with the total of the order as well.
- If you need to move the label over or down some, you can do this from the Misc. Settings under printers.
o Click on the printers tab.
 o This will show a XLoc and a YLoc.
o This will let you move the label down or over.

This is what the config pages look like
Related Articles
How to setup a Network/IP Printer
How to Setup an IP Printer First you need to find out the IP address of the printer SNBC/Epson printers you would turn the printer off and hold down the paper feed button on the front of the printer and turn it on with you still holding down the feed ...A11 POSBANK Printers Beep Setup
1. Switch off the printer. 2. Ensure that the paper roll is inserted properly and the end of the roll is outside the printer with the cover securely fixed. 3. While holding down the FEED button, switch on the power. 4. Continue holding the FEED ...WhozzCalling Caller ID Setup
NETWORK CALLERID The network caller ID must be plugged into the arrow network, if it is connected correctly the lights on the front of the box will light up as the location receives calls. • Log in to arrow and go to back office ( You must go in to ...World Pay Chip Reader Setup
World Pay Chip Reader Setup 1. Plug in device + power 2. Load driver for VX805 USBUART (in the ftp, under tech stuff>drivers>vx805 usbuart) If the device is properly connected to the station you will see an alert stating that the driver was installed ...Setup Employee With Admin Access
Log into Back Office > Configuration > Staff. Select the employee you'd like to create the admin account for. From the Employee Information screen click on Admin Access. Click the Staff is Admin? Checkbox and then have the employee set their User ...